From v0 to Cursor: Scaling Your AI Prototypes
Learn the essential workflow for transitioning your AI-generated projects from a browser-based prototype to a professional, local development environment.
The Modern Development Bridge
AI tools like and are incredibly powerful for rapidly creating "version 0" of an application. You can go from an idea to a working prototype in minutes.
But what happens next? As your project grows, you'll need the power of a full-fledged Integrated Development Environment (IDE). This guide shows you how to build the bridge from your browser-based prototype to a local setup using .
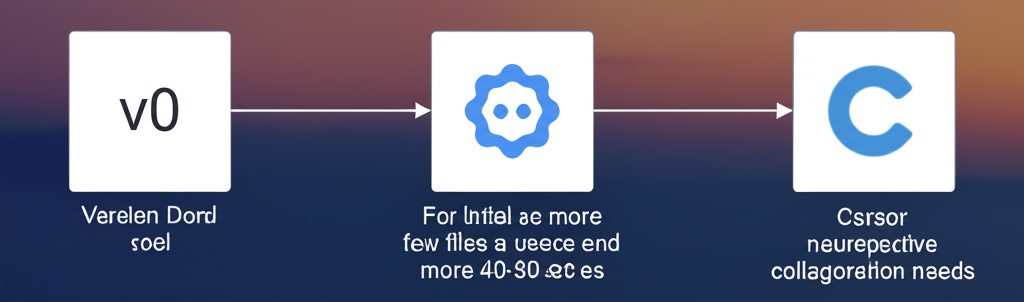
The core workflow is: → → .
When to Make the Leap
Browser-based AI tools are fantastic for speed, but you'll know it's time to transition to a local IDE like when you need to:
Transition Triggers
- Manage Complexity: Your project has grown beyond 20-30 files and navigating in the browser becomes cumbersome.
- Perform Advanced Edits: You need to refactor code across multiple files simultaneously.
- Debug Effectively: You need to set breakpoints, inspect variables, and step through code to fix complex bugs.
- Run Locally: You want to run a local development server for faster testing and offline work.
- Integrate with a Backend: You're ready to connect to a real database or custom backend APIs.
Step 1: Export from v0 to GitHub
The first step is to move your code from v0 into a permanent, version-controlled home on GitHub. v0 makes this incredibly simple with its built-in export functionality.
Open the Export Menu
In your v0 project, click the "..." menu in the top-right corner.
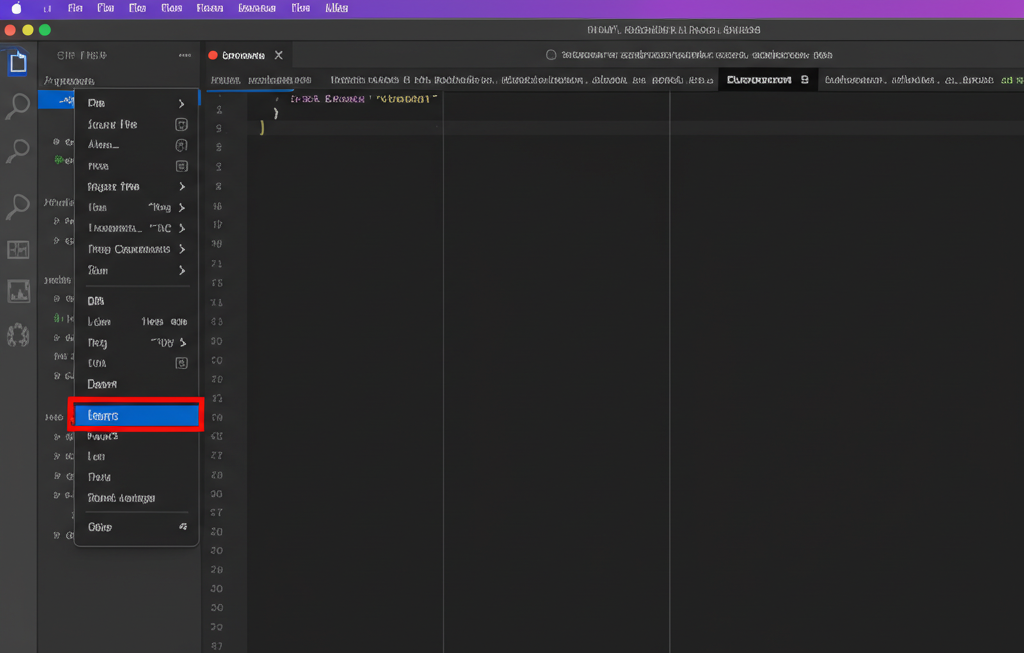
Add to Codebase
Select "Add to codebase". This will open a dialog to connect to your GitHub account.
Create a New Repository
Choose "Create new repository" and give your project a name. v0 will automatically create a new repository in your GitHub account and push all the project files to it.

Success!
Step 2: Clone to Your Local Machine
Now that your code is on GitHub, you need to bring it to your computer. This is called "cloning." We recommend using GitHub Desktop for a simple, visual experience.
Get the Repository URL
On your new GitHub repository page, click the green "Code" button and copy the HTTPS URL.
https://github.com/your-username/your-repo-name.gitClone in GitHub Desktop
Open GitHub Desktop, go to "File" > "Clone Repository...". Select the "URL" tab, paste the URL you copied, choose a local path where you want to save the project, and click "Clone".

It's a free tool that simplifies Git. For a full walkthrough on setting it up, check out our GitHub Basics Guide.
Download GitHub DesktopStep 3: Open in Cursor and Continue Building
With the project on your local machine, you're ready to unleash the full power of an AI-native IDE like Cursor.
Open the Project Folder
Launch Cursor, then go to "File" > "Open Folder..." and select the project folder you just cloned from GitHub.
Explore Your Project
You'll see the exact same file structure from v0, now in a powerful local environment. You can now:
- Use Cursor's AI chat to refactor code or add new features.
- Open the integrated terminal to install dependencies (`npm install`).
- Start the local development server (`npm run dev`).
- Use the debugger to troubleshoot issues.
Next Steps
You've successfully bridged the gap from prototype to production-ready development. Your workflow is now supercharged for both speed and power.
Master Version Control
Dive deeper into version control concepts that will help you manage your project as it grows.
Explore Cursor
Learn the fundamentals of the Cursor IDE to maximize your local development productivity.