GitHub Basics Guide
Learn how to save, manage, and share your AI-generated code with GitHub
Chapter 1 covers the basics of GitHub, setting up your account, and creating your first repository.
Introduction to Version Control
When you create code with AI tools like v0, you need a way to save your work, track changes, and share it with others. That's where GitHub comes in.
GitHub is like a Google Drive for code, but with powerful features designed specifically for software development. It helps you:
- Save your code in a secure, cloud-based location
- Track changes over time so you can go back to previous versions
- Collaborate with others without overwriting each other's work
- Deploy your projects to the web directly from your code repository
Getting Started with GitHub
1. Create a GitHub Account
First, you'll need to create a free GitHub account if you don't already have one.
2. GitHub Terminology Simplified
Repository (Repo)
A project folder that contains all your code files and their history.
Commit
A saved snapshot of your code at a specific point in time.
Branch
A separate version of your code, like a parallel timeline.
Clone
Making a copy of a repository on your computer.
Push
Uploading your local changes to GitHub.
Pull
Downloading the latest changes from GitHub to your computer.
Fork
Creating your own copy of someone else's repository on GitHub.
Merge
Combining changes from one branch into another.
GitHub Desktop Setup
While you can use GitHub directly through the command line, GitHub Desktop provides a user-friendly visual interface that's perfect for beginners.
1. Download and Install GitHub Desktop
Download GitHub Desktop2. Connect to Your GitHub Account
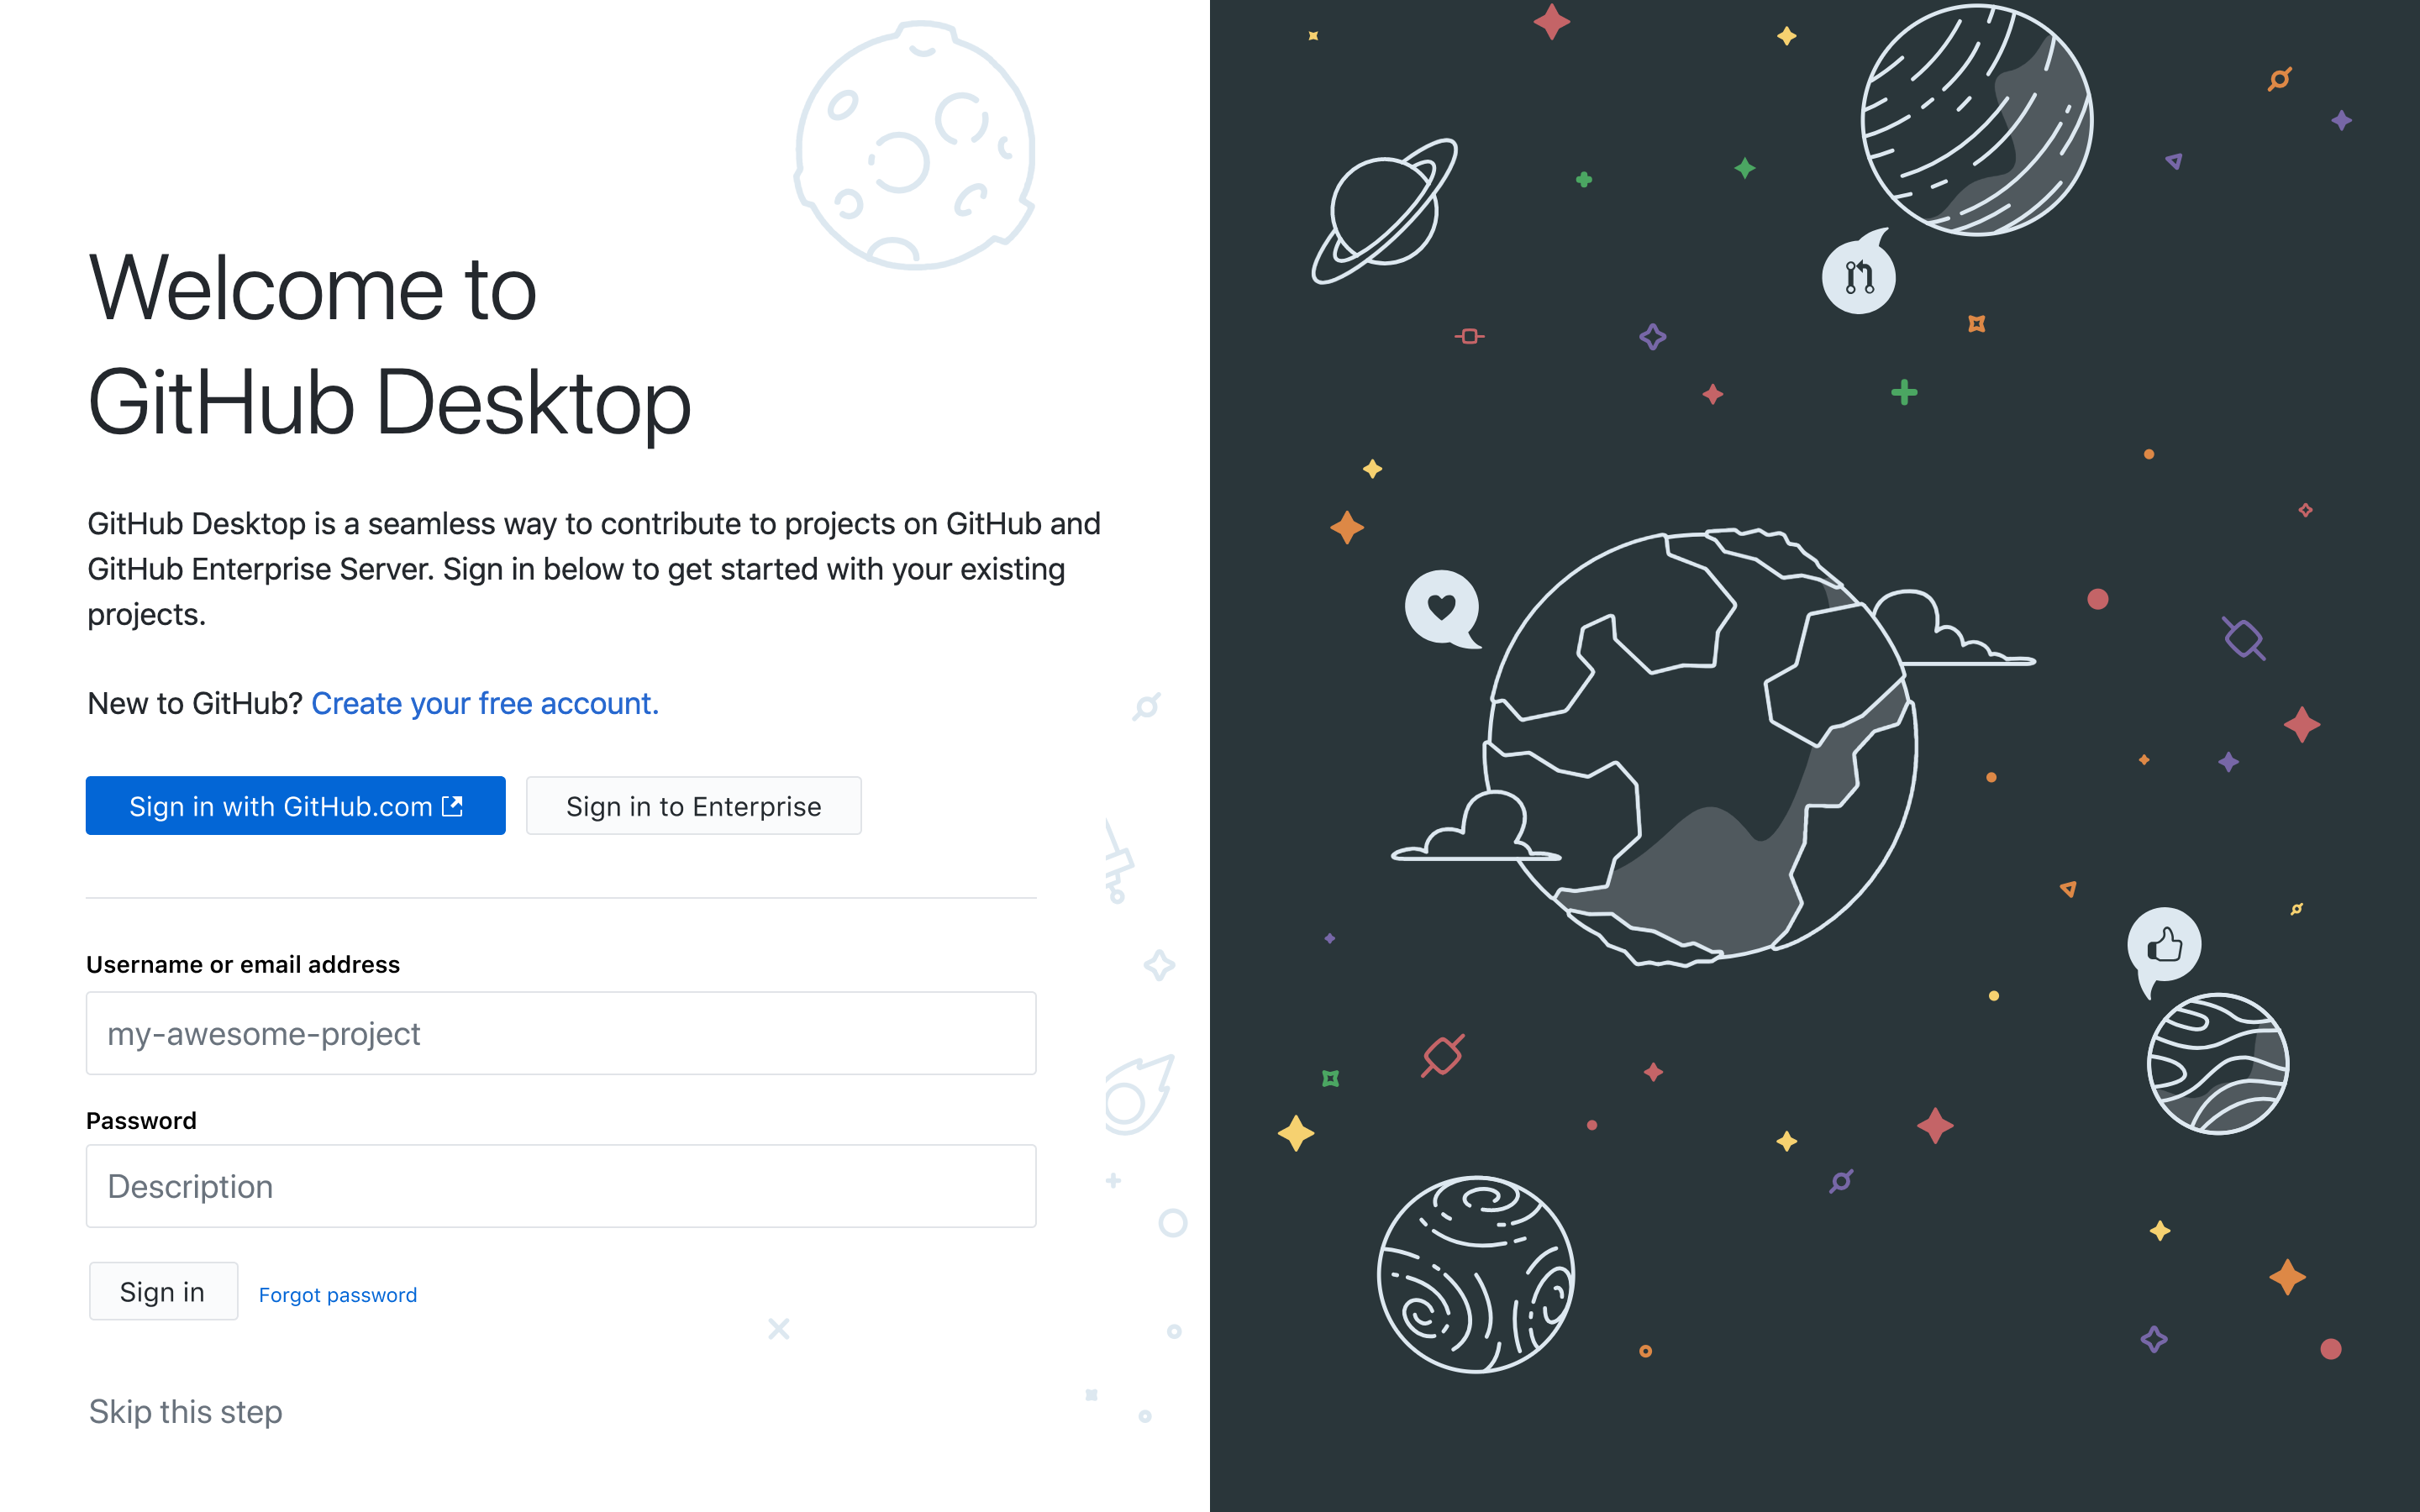
- Open GitHub Desktop after installation
- Click "Sign in to GitHub.com"
- Enter your GitHub username and password
- Complete any two-factor authentication if prompted
- Configure your name and email for Git commits when asked
Your First Repository
Creating a New Repository
In GitHub Desktop, click on "File" > "New Repository" or use the "Create a New Repository" button
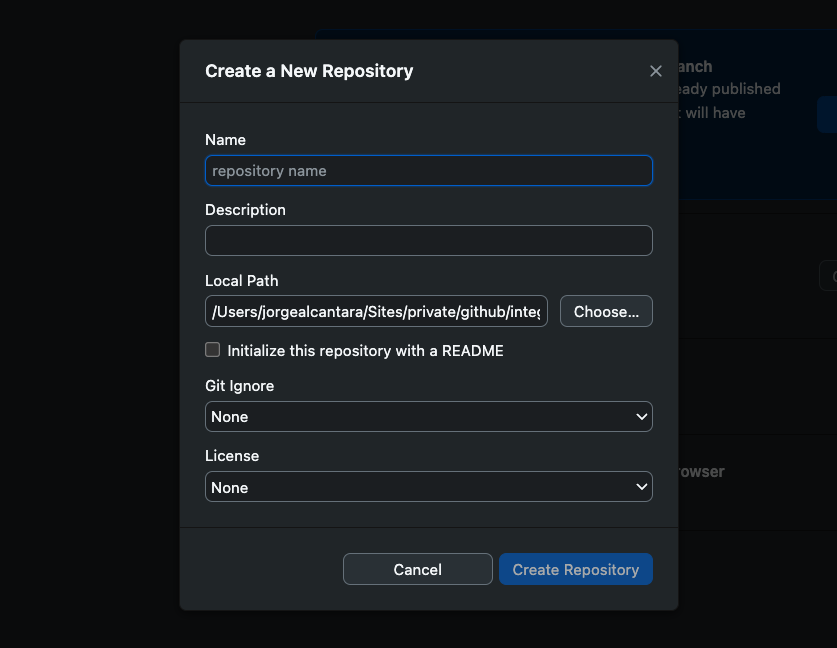
Fill in the repository details:
- Name: Choose a descriptive name for your project
- Description: (Optional) Add a short description
- Local Path: Choose where to save the repository on your computer
- Initialize with README: Check this box (recommended)
- Git Ignore: Choose a template based on your project type (e.g., Node)
- License: Choose an open-source license (MIT is a good default)
- Click "Create Repository"
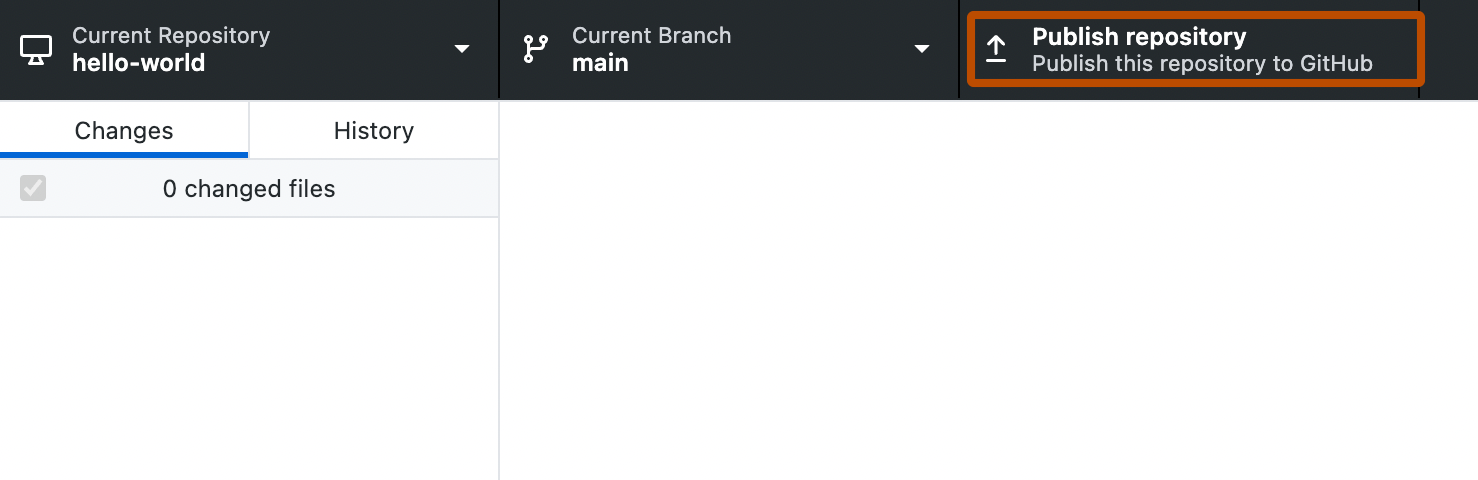
Publish your repository to GitHub by clicking "Publish repository"
Basic GitHub Workflow
The GitHub Workflow

The basic GitHub workflow consists of these steps:
- Make changes to your code using your preferred editor
- Review changes in GitHub Desktop to see what you've modified
- Commit changes with a descriptive message explaining what you did
- Push changes to upload your commits to GitHub
Making Your First Commit
Make some changes to your project files using any code editor
Open GitHub Desktop and you'll see the changed files highlighted
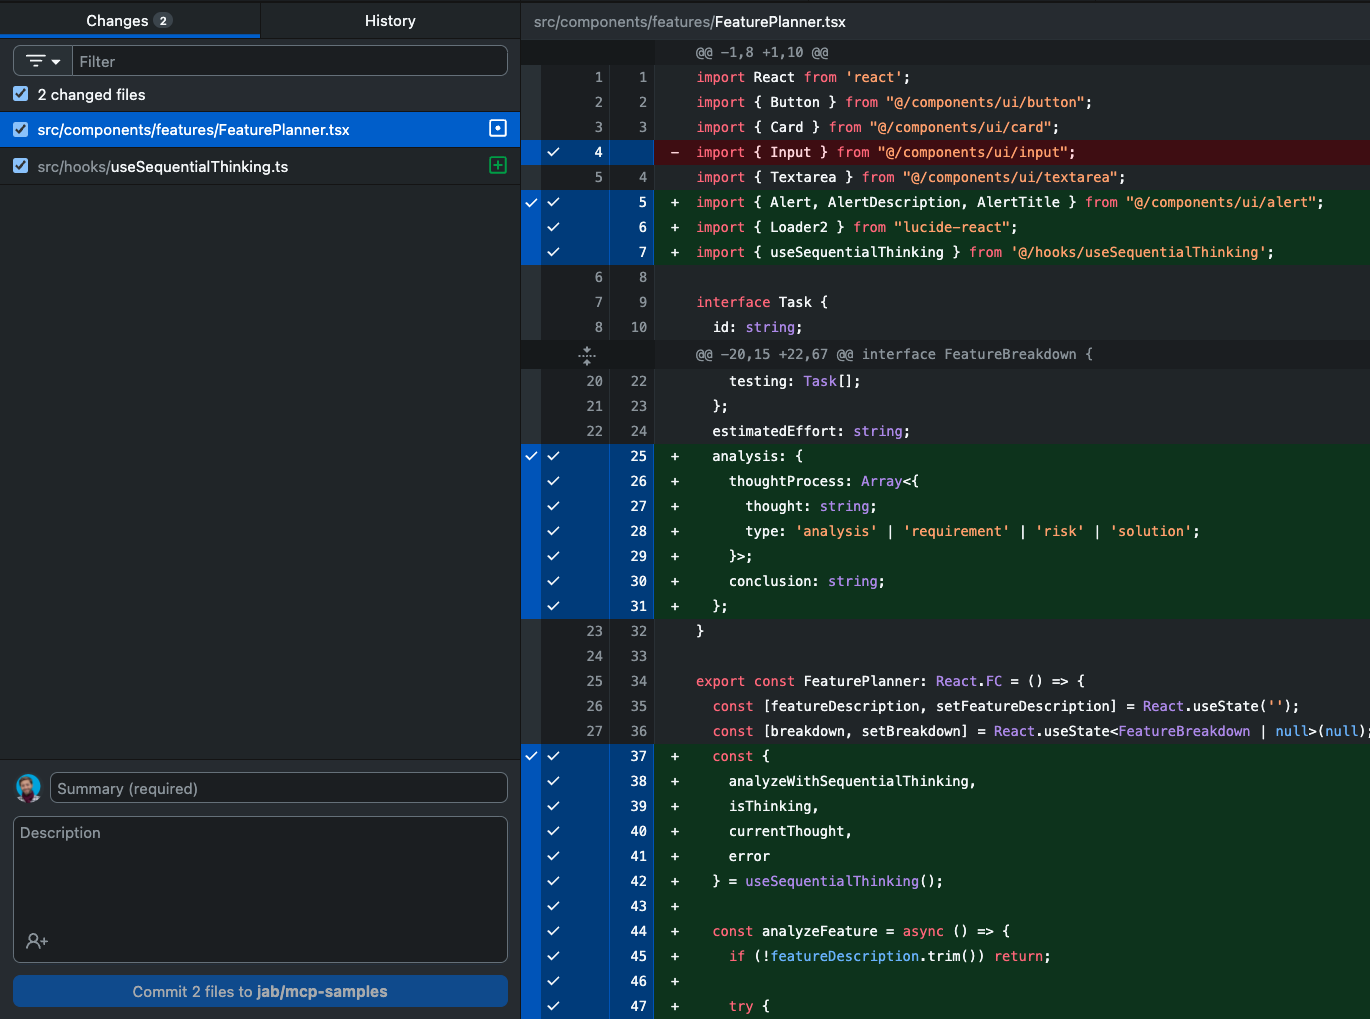
Write a summary of your changes in the "Summary" field (e.g., "Update header styling")
Optionally, add more details in the "Description" field
Click "Commit to main"
Click "Push origin" to upload your changes to GitHub
Commit Best Practices
- Commit frequently with small, logical changes
- Write clear commit messages that explain what and why (not how)
- Push your changes regularly to avoid losing work
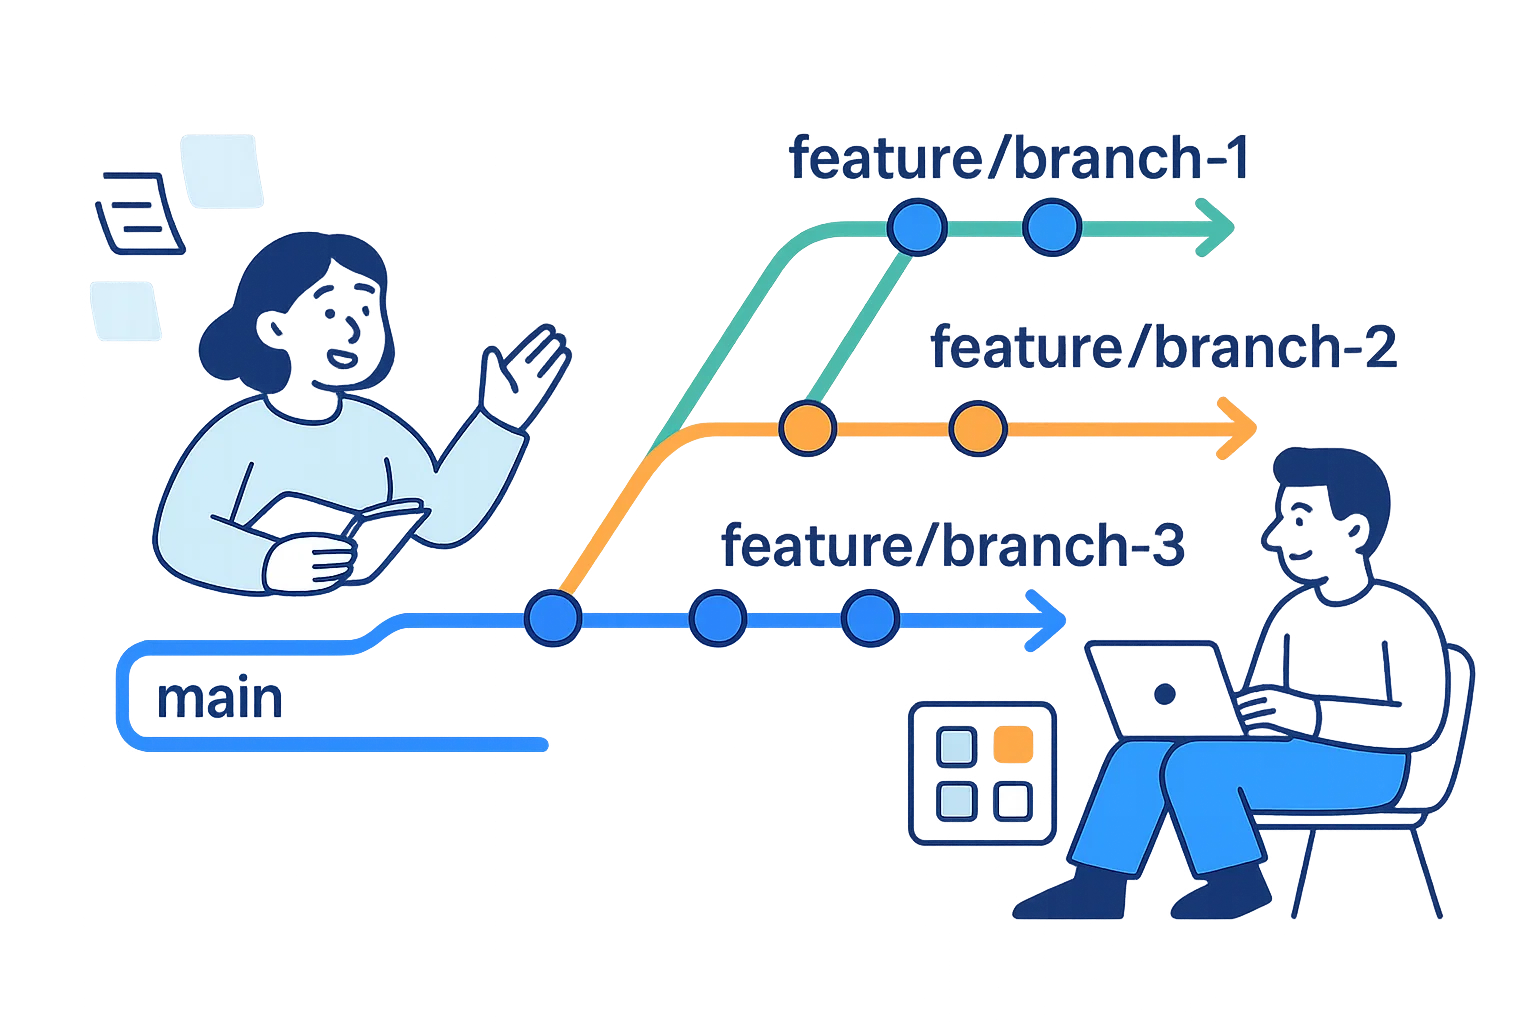
Working with Branches
What Are Branches?
Branches allow you to work on different versions of your code simultaneously. Think of them as parallel timelines where you can develop features or fix bugs without affecting the main codebase.

When to Use Branches
- Developing new features
- Fixing bugs
- Experimenting with code changes
- Working on multiple features simultaneously
Branch Naming Conventions
feature/add-login- For new featuresbugfix/fix-header- For bug fixeshotfix/critical-error- For urgent fixesrelease/v1.0- For release preparation
Creating and Using Branches in GitHub Desktop
Forking Repositories
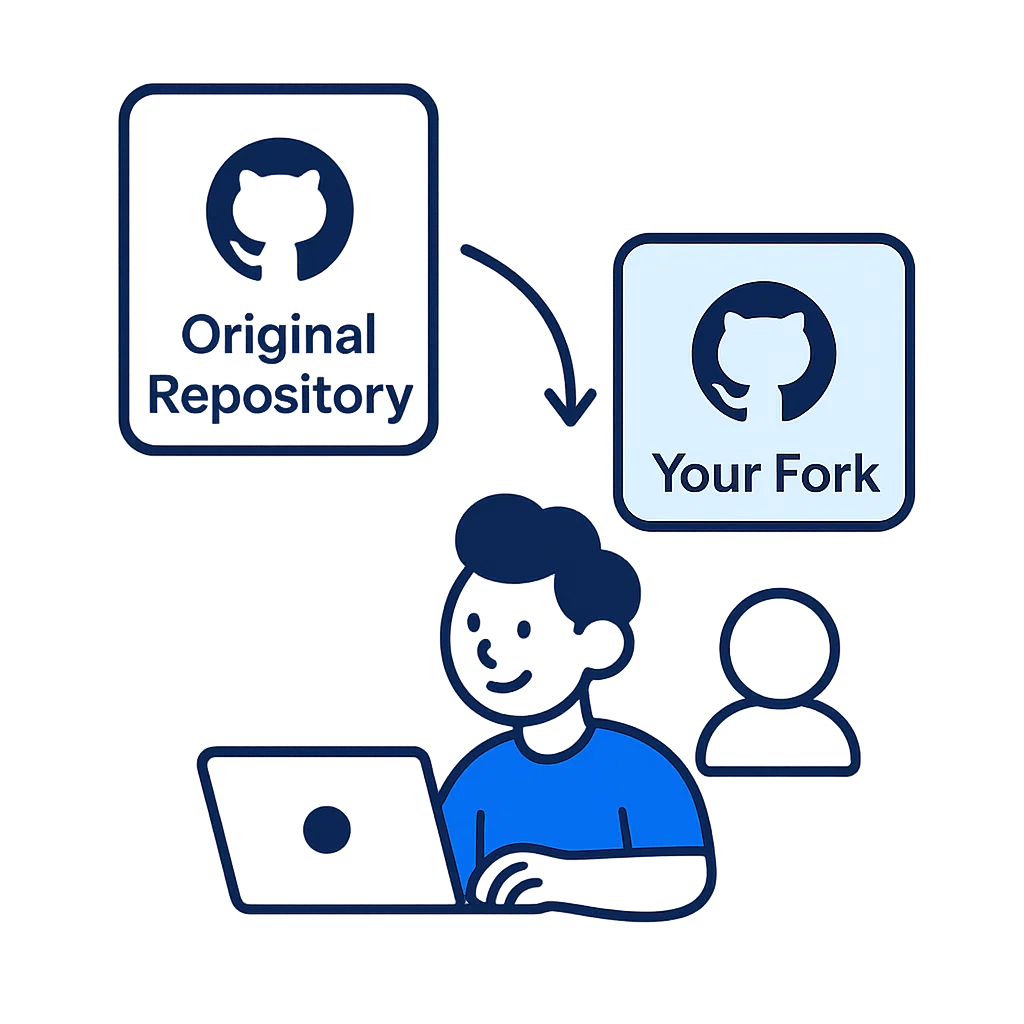
What is Forking?
Forking creates your own copy of someone else's repository on GitHub. This allows you to freely experiment with changes without affecting the original project.
When to Fork a Repository
- Contributing to open-source projects
- Using someone else's project as a starting point
- Experimenting with changes to a public project
- Creating your own version of a template or starter project
How to Fork a Repository
- Navigate to the GitHub repository you want to fork
Click the "Fork" button in the top-right corner of the page

- Select your account as the destination for the fork
- Wait for GitHub to create your copy of the repository
- You'll be redirected to your new forked repository
Working with a Forked Repository
- Clone your forked repository to your computer using GitHub Desktop
- Make changes to the code as needed
- Commit and push your changes to your fork
- To contribute back to the original project, create a pull request (covered in the next section)
Keeping Your Fork Updated
To keep your fork in sync with the original repository:
- Add the original repository as a "remote" called "upstream"
- Fetch changes from the upstream repository
- Merge those changes into your local branch
- Push the updated code to your fork
GitHub Desktop has a "Keep fork synced" option to automate this process.
Merging Changes
Understanding Merges and Pull Requests
Merging combines changes from one branch into another. This is how you integrate new features or bug fixes into your main codebase.
Pull Requests (PRs) are GitHub's way of proposing changes and requesting that someone review and merge your code. They're essential for collaboration.

Merging Branches in GitHub Desktop
- In GitHub Desktop, switch to the branch you want to merge into (usually "main")
Click on "Branch" in the top menu, then select "Merge into current branch..."

- Select the branch you want to merge from
- Click "Merge [branch] into [current branch]"
- Push the changes to GitHub by clicking "Push origin"
Merge Conflicts
If the same lines of code were changed in both branches, you'll encounter merge conflicts that need to be resolved manually.
GitHub Desktop will guide you through the conflict resolution process, allowing you to choose which changes to keep.
Creating a Pull Request
Pull requests are used to propose changes to a repository, especially when contributing to projects you don't own or when working with a team.
- Push your branch to GitHub
In GitHub Desktop, click "Create Pull Request" (or go to the repository on GitHub.com)
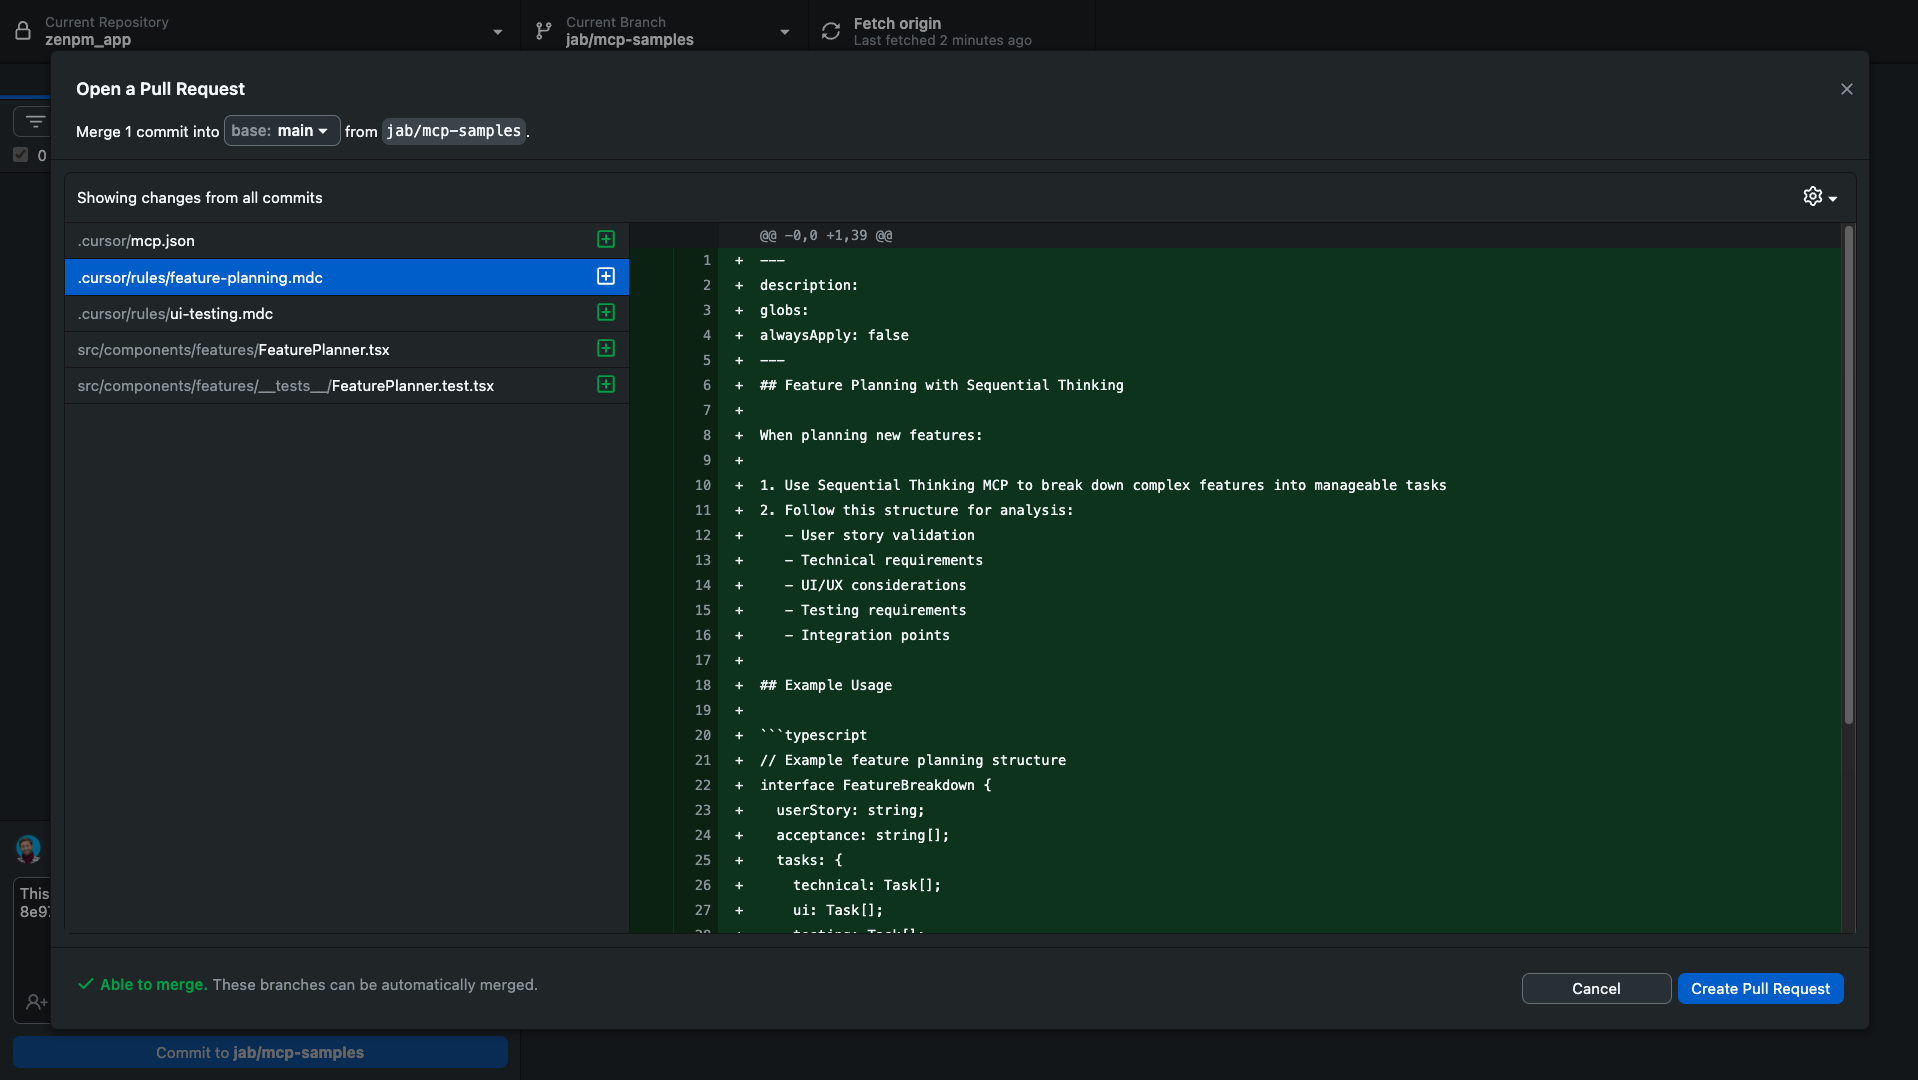
- Your browser will open to GitHub.com with the pull request form
- Fill in a title and description explaining your changes
- Select the base branch you want to merge into (usually "main")
- Click "Create pull request"
Good PR Descriptions Include:
- What changes you made
- Why you made them
- How to test the changes
- Screenshots (if applicable)
- Related issues or tickets
PR Review Process:
- Reviewers examine your code
- They may leave comments or request changes
- Address any feedback by pushing new commits
- Once approved, the PR can be merged
GitHub with AI Tools
Integrating GitHub Across Your AI Development Workflow
GitHub serves as the central hub for your code across different AI development tools. Here's how to integrate GitHub with various tools in the VibeCodex ecosystem:
v0
- Export directly to GitHub
- Fork public v0 projects
- Create new repositories
- Add to existing repositories
Cursor
- Clone repositories directly
- Built-in Git controls
- Commit, push, and pull
- Branch management
Replit
- Import from GitHub
- Connect repositories
- Sync changes
- Deploy from GitHub
Viewing Projects in GitHub Desktop
After exporting or linking your project with GitHub, you can open and manage it in GitHub Desktop:
- Open GitHub Desktop
- Click "File" > "Clone Repository"
- Select your repository from the list or enter its URL
- Choose where to save it on your computer
- Click "Clone"

Seamless Workflow
With GitHub as your central code repository, you can:
- Start a project in v0
- Export to GitHub
- Continue development in Cursor
- Deploy from GitHub to Vercel or other platforms
- All while maintaining a complete history of your changes
Deploying from GitHub
One of the biggest advantages of using GitHub is how easy it makes deploying your projects to the web. Services like Vercel and Netlify connect directly to your GitHub repositories.
Deploying to Vercel
- Go to Vercel.com and sign up or log in
- Click "Add New..." and select "Project"
- Connect your GitHub account if prompted
- Select the repository you want to deploy
- Configure your project settings (Vercel will auto-detect most frameworks)
- Click "Deploy"

Once connected, Vercel will automatically deploy new versions whenever you push changes to GitHub.
When to Transition to Cursor
GitHub serves as the critical bridge between v0 and more advanced development environments like Cursor. While v0 is excellent for initial project creation and simple changes, you'll eventually need to transition to a more powerful tool like Cursor.
When to make the switch
Consider moving from v0 to Cursor when:
- Your project has grown to 40-50+ files
- You need to make complex changes across multiple files
- You're implementing advanced features that require detailed code editing
- You need to debug or troubleshoot specific issues
- You want to run and test your code locally
Once you've exported your v0 project to GitHub, you're perfectly positioned to continue development in Cursor. Check out our Cursor Rules & Prompt Templates Guide to learn how to clone your GitHub repository and continue development in a more powerful environment.
Troubleshooting Common Issues
Authentication Failed
Try signing out and back in to GitHub Desktop. If that doesn't work, generate a personal access token on GitHub and use that instead.
Can't Push Changes
Someone else might have pushed changes you don't have. Try pulling first (Fetch origin > Pull origin), resolve any conflicts, then push.
Merge Conflicts
When two people change the same code, you'll need to manually resolve conflicts. GitHub Desktop will show you the conflicts and let you choose which changes to keep.
File Too Large
GitHub has a file size limit of 100MB. For larger files, consider using Git LFS or keeping them out of your repository.
Next Steps
Now that you understand the basics of GitHub, you're ready to take your development workflow to the next level.
Move to Cursor IDE
Learn how to continue your development in Cursor, a powerful AI-assisted code editor perfect for larger projects.
Collaborate with Pull Requests
Learn how to propose changes and review code with teammates using pull requests.
GitHub Issues
Track bugs, enhancements, and tasks using GitHub's built-in issue tracking system.
GitHub Actions
Automate your workflow with custom CI/CD pipelines that run whenever you push code.